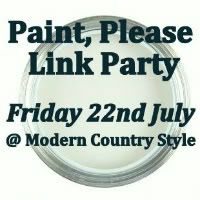
I've made you a present.
{I know, too kind, right?!}
It's a button for my
Paint, Please link party
{to link up all your paints projects: rooms, furniture, crafts....}.
If you'd like to put one on your blog post ready to link up then that would be just fine and dandy.
Here it is, complete with the html code
to make a clickable button on YOUR blog:

You know when you have an experience that just sets you alight?
Those of you who follow me on Facebook will know how I felt after Annie Sloan's Paint Course.
I came home absolutely abuzz.
I was bouncing off the walls with ideas, information and inspiration.
It was an unbelievably lovely day.
To be able to sit with like-minded people and
learn from an expert like Annie Sloan was such a privilege.
{Thank you so much, Annie.}
Once again, I think it's worth reiterating that the fantastic thing about Annie Sloan's Chalk Paints is that they can be successfully painted STRAIGHT ON to things such as metal, glass, wood, melamine, and varnish.......
Like this:
And produce long-lasting results like this:
Say goodbye to that sandpaper.
Oh, and the primer too.
The first thing we learnt about what makes Annie Sloan's paints different,
is that you can use them to create the texture.
Wouldn't it be great to learn how to produce something like this,
which looks as though it's come straight from a French Chateau?
You want to know how to do it right now?
Oh, go on then!!!!
You get this effect by painting the FIRST COAT of paint in all directions, and by loading your brush with more paint than usual. Doing this will help to create the impression of layers and layers of paint that have accumulated over years, when combined with the following steps.
It doesn't have to be perfect.
In fact, it SHOULDN'T be perfect!!
{Was there ever a better instruction?}
Blobs and are good.
Then for the second coat, paint in the usual backwards-forwards fashion with another layer of paint, which should be of 'normal' thickness
{if the paint seems a little thin, it's easy to water down slightly if necessary}.
Step three is to sand gently (or firmly for a more distressed look)
so that the top coat is rubbed back in places to the first coat.
By sanding all over with the same pressure,
this will happen naturally in bumps and ridges that
you created with the first coat of paint.
If there are other specific areas that you'd like rubbing back
(for example, corners, or any areas that would receive knocks and scrapes),
then by all means pay more attention to those areas.
Now, having waxed lyrical about the Chalk Paint,
we learned next that they work best for a long-lasting finish
when finished with wax.
Annie Sloan has two types of waxes.
Clear wax and dark wax.
The clear wax looks like this:
When I've heard about waxing furniture with beeswax,
I've always thought of Wax Polish which needs so much
elbow grease and buffing and rubbing.
Interminable.
That is NOT what Annie Sloan's waxes are like.
Think more of smearing a thin layer of margarine on your table.
But with a lovely smell!
Later, when its dried, you can gently buff it.
The more you rub, the more of a shine you'll end up with.
But it's NOT hard work.
More like rubbing in moisturising cream.
See that hair-dryer at the front of the image above?
Whatever could it be doing there?
Find out tomorrow for the most magical thing ever!!
Love
Sarahx


0 comments:
Post a Comment